Metadata Explained
The term “metadata” refers to data that describes other data. If you take a photograph with a digital camera or cell phone the photo may be captured with the date, time and GPS coordinates of when and where the photo was taken (depending on the specific device capabilities). The photo itself is of course the actual data you are interested in primarily, while the date, time and GPS coordinates are metadata that gives more information about the photo.
ScannerVision metadata contains information about the documents that are processed by ScannerVision and can be:
-
Generated by the ScannerVision itself or the connectors used in the template. This includes data such as the user who captured the document, the date and time of processing and in the case of the Windows File System connector, the output file name of the document.
-
Obtained from the document itself through OCRing or barcode reading.
-
Captured on the client by the user who has to provide this information at the time of the document capture.
ScannerVision metadata is a collection of name value pairs where the name is the identifier of a specific value e.g. YYYY=2013. “YYYY” is the name and “2013” is the value which in this case represents the year when the document was processed. The name of the metadata is also known as the Metadata Tag or just Tag for short. The terms metadata and tag are used interchangeably in the text. Where the use of metadata is allowed in the ScannerVision processing process, you would reference the tag name in square brackets e.g. [YYYY] and the processing engine will replace the name with the actual value when a document is processed.
Here is an example.
Let us say you want to produce a PDF document with a file name that includes the date and time of when the document was processed and you want to copy the file to a network share using the Windows File System connector (WFS). In the WFS connector’s “File Name” edit box you would enter the following:
Document [DD] [MMMM], [YYYY] - [HH]_[NN]_[SS].pdf
This will expand to (assuming the date and time of processing was 15 March, 2013 at 10:23:11 AM):
Document 15 March, 2013 - 10_23_11.pdf
You can find more examples here.
Some metadata is always available like the date and time related tags used in the example above. You don’t have to configure anything for them to be available, you just use them. These are called the Standard tags. All other tags have to be defined by you, the author of the template. You can define metadata on a global level (not worldwide of course, only global across all templates) and/or on a template level. Metadata values can be obtained during document capturing by ScannerVision clients (desktop or MFP) through the answers users provide to template questions or they can be obtained by the processing engine during document processing through for example barcode reading or zone OCRing. If required, the values of metadata you have configured (i.e. all non-standard tags) could be modified during document processing with the use of scripts.
Some connectors offer additional tags that are not necessarily available outside the context of the particular connector. An example of this are the UNIQUESUFFIX tags offered by the Window File System connector. The specifics of these tags are discussed in the File System Connector section.
The value of a tag does not necessarily have to correlate with how it is presented. You could for example have a value of “A-B” and have it presented as “A:B”. ScannerVision provides powerful functions with which you can present the data in the format you want without changing the value itself.
For example, let us say you have to read a barcode on the first page of an order form that includes the customer and order numbers separated by a space. So you configure a barcode rule that stores the barcode value in the CUSTOMERORDER tag. Now, let us say you process and order form with the barcode below printed on it:
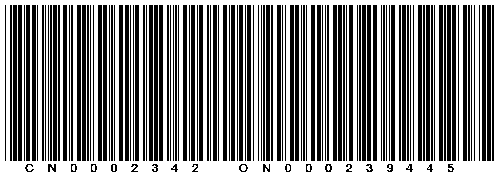
When ScannerVision processes the document it will read the barcode and put the value “CN0002342 ON000239445” in CUSTOMERORDER tag as instructed. But how will you separate the customer number from the order number? You have two choices. You can either split the two sections on the space character between them or you can pick the characters you need. Either way, you still reference the CUSTOMERORDER tag whenever you need either the customer number or order number. You just need to add some functions that will instruct ScannerVision to take only the part of the data that you need.
You could for example use the split function to tell ScannerVision to split the two parts of the barcode on the “ “ (space) character between them and then use the take function to select first part for the customer number or the second part for the order number.
To extract the customer number you would use the following expression:
[CUSTOMERORDER (split “ “)(take 1)]
and to extract the order number you would use this expression:
[CUSTOMERORDER (split “ “)(take 2)]
Another approach to obtain the customer and order number could be to tell ScannerVision to take characters 1-9 for the customer number and 11-21 for the order number.
Where you need the customer number only you would use this:
[CUSTOMERORDER (take 1-9)]
and where you need the order number only you would use this:
[CUSTOMERORDER (take 11-21)]
Both techniques would yield the required result. You may ask, “But which one should I use?”. The answer is - as is often the case - it depends. If the customer and order numbers are fixed in length i.e. the customer number will always contain 9 characters and the order number 10, then the second technique without the split is the better choice since there is less typing for you and less work for ScannerVision to do. If the numbers are varying in length however you obviously cannot count characters and therefore would have to make use of some sort of delimiter that marks the end of the customer number and the start of the order number. In our example the delimiter is the space character. In this scenario the first method is obviously the one to use.
The ScannerVision metadata functions are explained in detail in the Functions section. Once you understand how they work you can do very powerful things with your metadata!
ScannerVision provides you with a powerful ScannerVision Expression Editor with which to create and test your expressions. Using the ScannerVision Expression Editor you can see the result of your expressions using sample data that you can modify in the editor itself.