Configure CSV
The CSV user import setup screen is shown below. For information about the import options please refer to the Import Options section.
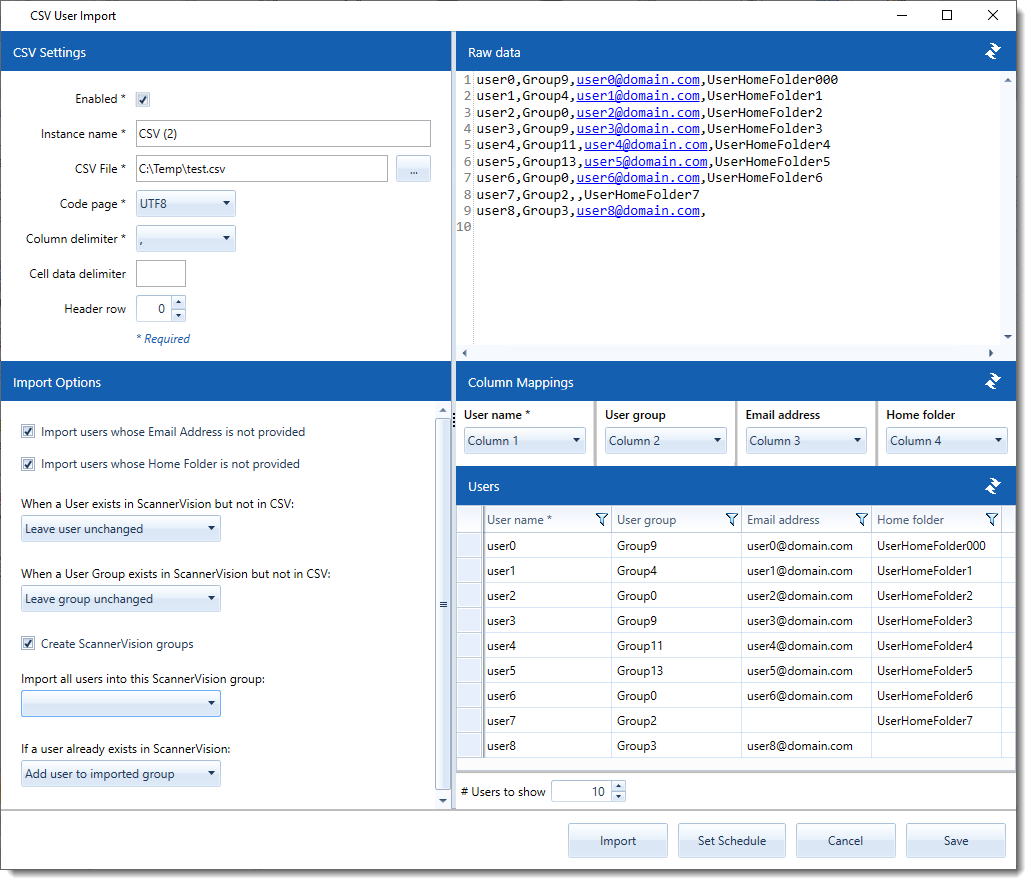
Enabled
Enable/disable the import instance.
Instance name
The name describing this import instance. This is useful when you have multiple import sources configured.
CSV File
The path to the CSV file to import.
Code page
The character encoding scheme that is used by the CSV file.
Column delimiter
The character that delimits columns in the CSV file.
Cell data delimiter
If column values contain multiple items, e.g. the email address contains multiple email addresses separated by for example a comma then enter a comma in the "Cell data delimiter" edit box. If there are different cell data delimiters in the CSV file, enter them all without any spaces e.g. ",|." (the " characters are not cell data delimiters). Only the first item of the cell is imported.
Header row
If the CSV file contains a row that specifies header information, enter the row number here.
Once you have configured the CSV settings you can click the refresh button in the top right hand corner of the respective sections. Configure column mappings to the respective user fields by using the drop down boxes in the “Column Mappings” section. You can then press the refresh button in the “Users” section to confirm that the mapping is correct. The number of user records that is loaded can be set in the “# Users to show” exit box.