SQL Picklist
A SQL picklist obtains its values from a database. The editor window is shown below:
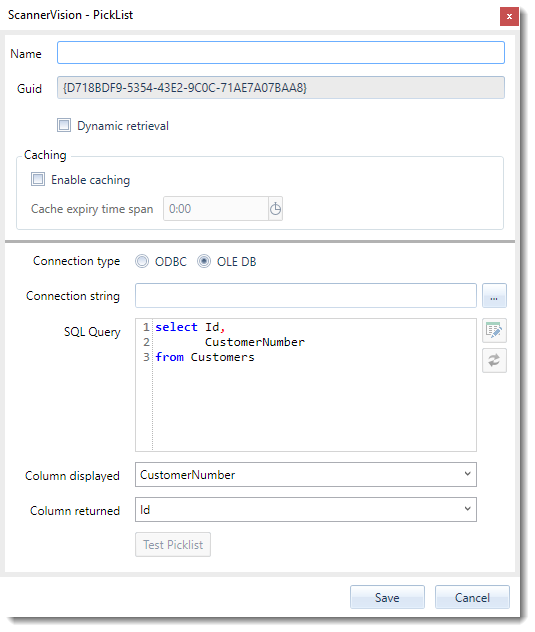
Connection string (Required)
The connection string contains the information necessary to connect to a database engine. Refer to Appendix C - Database Connection Strings for more information.
SQL Query (Required)
The SQL query is what gets executed by ScannerVision to obtain picklist values. You can be as specific or elaborate as you need to be with the query you specify. Any legal SQL query is allowed but try to observe common SQL query best practice. For example, don’t use “SELECT *” when you only want 1 or 2 columns. It puts unnecessary load on ScannerVision and the network as result sets get large. To this end we encourage you to make use of the SQL Query Builder which you can launch by pressing the  button to the right of the SQL editor. The SQL Query Builder window is shown below:
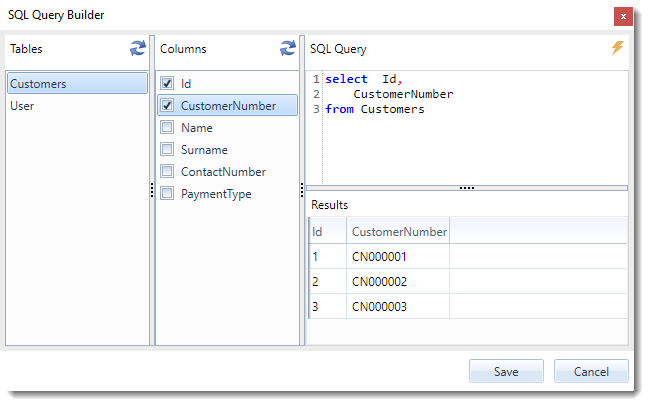
Select the table from which you want do the look-up in the “Tables” column. Once you’ve selected the table, the “Columns” list is updated with the columns in the table. To refresh the list of tables and columns press the respective  button at the top of the list.
In the columns list select the columns you want to return from the table. The SQL query editor updates automatically with the selected table and columns.
To test the query press the  button in the top right hand corner of the window. If the query execution is successful the first 3 records of the result set are shown in the “Results” grid.
Note
The SQL Query Builder is a one-way tool. If you launch the SQL Query Builder with an existing SQL query, the table and columns referenced in the query will not be selected automatically when the SQL Query Builder window opens. You will have to make your selections again to modify your query.
Column displayed/returned (Required)
After you have entered or changed a query you have to update the list of columns returned by the query. Do this by clicking the  button to the right of the SQL editor.
Select the column which you want displayed to the user and which column’s value must be returned to ScannerVision as the selected value. You can enter the column names manually or you can select the column from the respective drop down list box. The list box is populated by executing the query against the database and extracting the column names from the result set.
Please refer to the Value displayed and value returned section for an explanation of the significance of the “Column displayed” and the “Column returned”.
Test Picklist
To test that your picklist is configured correctly press the “Test Picklist” button. You will be presented with the “Picklist Results” dialog shown below:
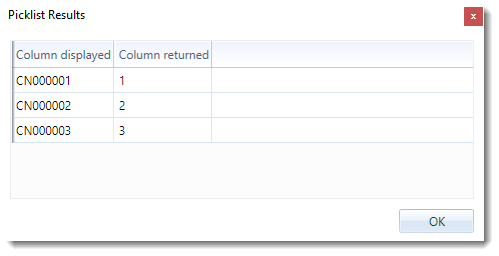
The dialog will show a maximum of 3 rows. Verify that the “Column displayed” and the “Column returned” values are what you expected.
Providing temporary metadata tags
If you have referenced ScannerVision metadata tags in your query you will be prompted to provide temporary values for the metadata tags you’ve used when updating the columns or testing the picklist:
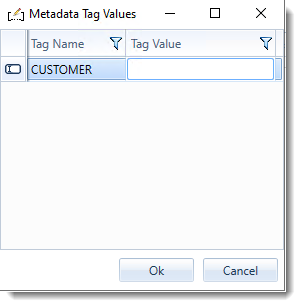
The values you specify here are used to by ScannerVision to substitute for the used metadata tags. If you enter legitimate values then the query should execute successfully.