Zone Recognition Settings
On the Zone Recognition Settings screen you define regions known as zones in which OCRing or barcode reading has to be done. Only the area of the page that falls within the boundary of the zone is processed. ScannerVision offers four different types of OCRing that can be performed as well as barcode reading. The OCR options are:
| OCR | Optical Character Recognition - the recognition of regular text. |
| ICR | Intelligent Character Recognition - the recognition of hand written text. |
| OMR | Optical Mark Recognition - the recognition of tick marks, X's, lines, check marks, and scribbles commonly found on surveys, polls, academic exams and official applications. |
| MICR | Magnetic Ink Character Recognition(MICR) - the recognition of special numbers and symbols typically found on checks. |
Metadata tag names
All five types of zones can be defined on the same page and can be enabled and/or disabled individually. Every zone that you configure must be given a unique name which is the name by which you would refer to the data that was retrieved from that zone. Zones can be configured to be processed on multiple pages in which case ScannerVision appends the page on which the zone was processed to the name you specify in the form of NAME - Page. If for example your zone name is CUSTOMERADDRESS and you have configured the zone to be processed on page 1 and 4, the tag names that you would reference would be CUSTOMERADDRESS-1 and CUSTOMERADDRESS-4. There will also be a tag name without a number which will hold the value of the zone that was read on the last page so using the example above CUSTOMERADDRESS would hold the same value as CUSTOMERADDRESS-4. You can configure a zone to be processed on any number of pages e.g. “1, 2, 5, 10-12”. The pages on which the zone would be processed would be pages 1, 2, 5, 10, 11 and 12.
A zone allows you to provide a description and a sample value for use in the ScannerVision Expression Editor. The description you enter will appear as a tool tip when the mouse is hovered over the tag name and the sample value is used as the tag’s value.
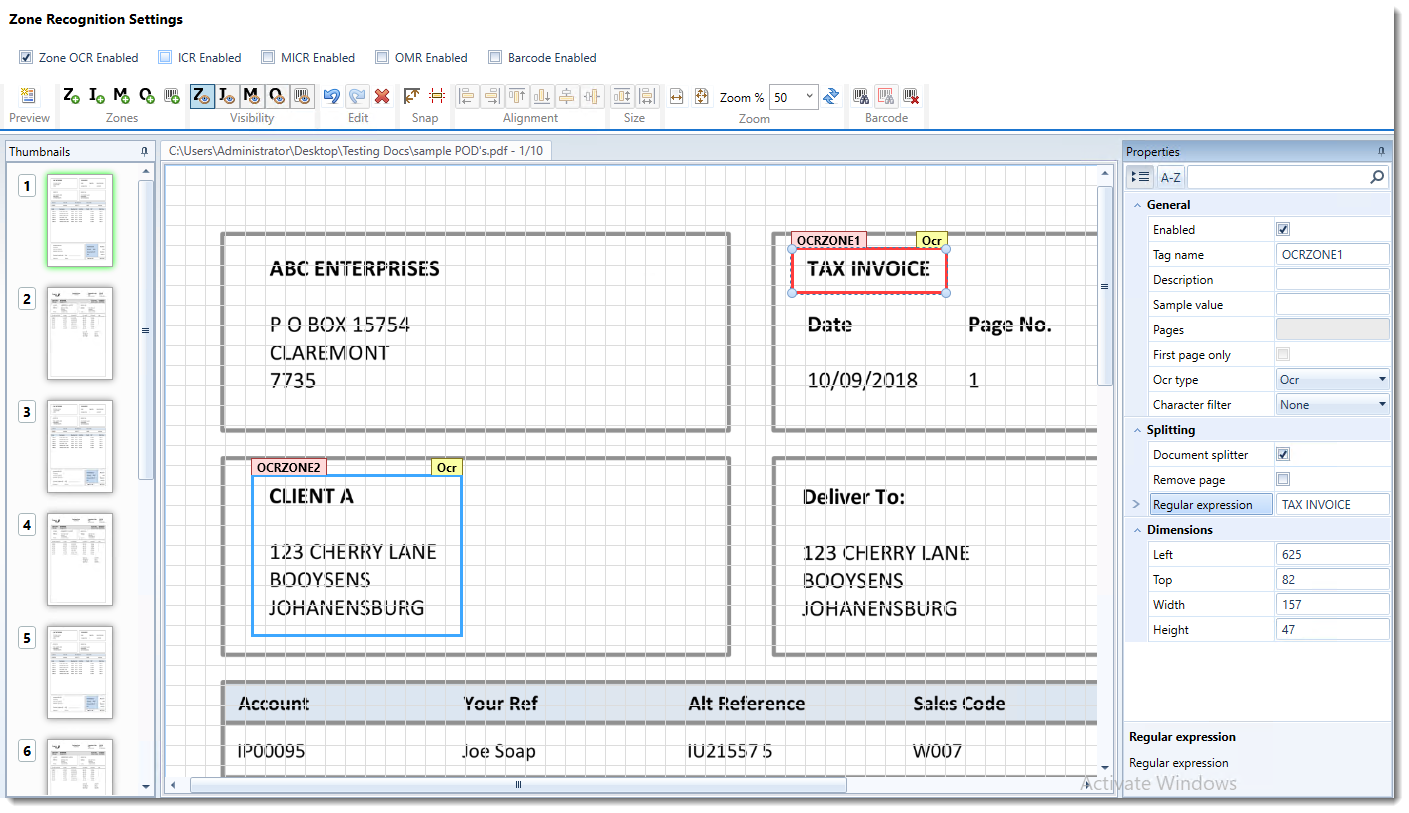
The Zone Editor is shown below.
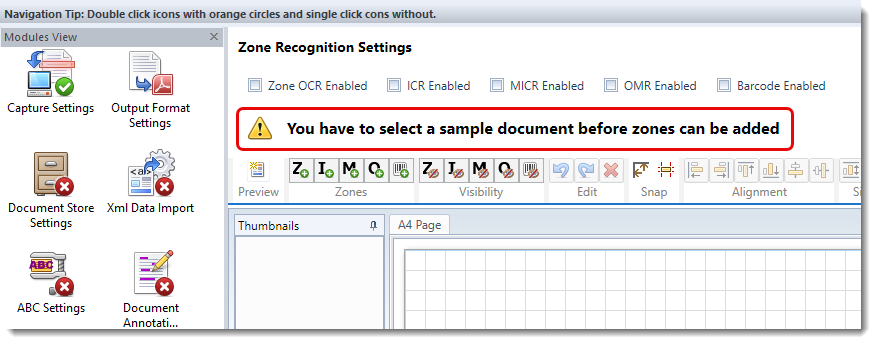
Zones cannot be configured without a sample document being attached. If you don’t have a sample document attached, you will see a warning at the top of the zone editor window as shown below:
Enabling and disabling Zone OCR
You can enable or disable the 5 types of zone processing individually by selecting the respective check box namely “Zone OCR Enabled”, “OMR Enabled”, “MICR Enabled”, “OMR Enabled” and “Barcode Enabled”.
Opening a sample document

Press the “Open sample document” button in the “Preview” group shown above to open a sample document. It stands to reason that the sample document you open be representative of the documents that would be processed by the template.
Adding zones
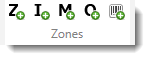
In order to add a zone to the page select the zone type by pressing the respective button in the “Zones” group shown above. The letters represent the type of zone in the following way:
| Z | Zone OCR |
| I | ICR |
| M | MICR |
| O | OMR |
 |
Barcode |
If you want to place a zone in which you want regular text to be OCRed, click the “Z” button. The toolbar will now look like this:
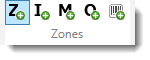
You can now draw a zone by left clicking in the zone editor window to define the top left corner and dragging the zone’s width and height while the left mouse button is pressed. If you just click and release the left mouse button in the zone editor, a zone is drawn that is 50 pixels high and 150 pixels wide. After you have placed the zone, you will notice that the selected zone type is reset. If you want to place multiple zones of the same type, press the Control key (Ctrl) on the keyboard while you select the zone type. To stop placing zones click the selected zone type button again.
Re-sizing and repositioning zones
Zones can be re-sized and repositioned using the mouse or by modifying the coordinates in the Property Editor. To re-size or reposition a zone select it. You will notice that the zone changes color from blue to red and that sizing handles (blue circles) appear in the corners:
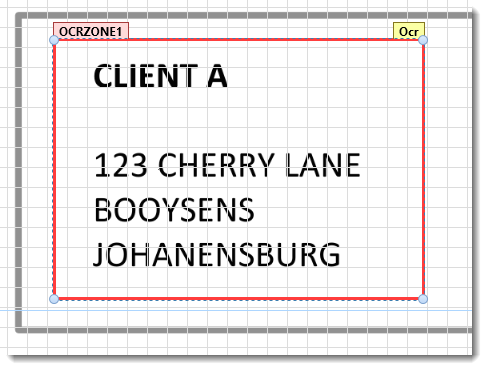
To re-size the zone drag the blue circle which you want to move to the desired location.
To reposition the entire zone, left click anywhere in the zone with the mouse and while the left mouse button is pressed drag the zone to the desired position.
You could also type in new values for the Left, Top, Width and Height positions in the property editor.
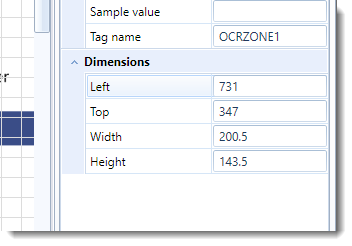
Barcode zones are allowed to have a negative “Top” and “Left” coordinate. You would need this in situations where barcodes are placed close to the top and/or left edge of the page. See Zonal Barcodes for more details.
Changing the visibility of zones

You can show or hide zone types. Changing the visibility of zones has no influence on the processing of the zone by the ScannerVision Processing Server so hidden zones will still be processed if they are enabled.
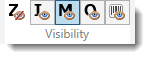
The visibility buttons in the “Visibility” group toggles the visibility of zone types. At least one zone of a particular type has to be placed on any of the pages for its respective visibility button to become available. In the screen shot above you can see that the “Z” and “M” buttons are enabled while the “I” and “O” buttons are not. To disable for example all the Zone OCR zones, click the “Z” button. The open eye icon overlay changes to an eye with a red line through it as shown below:
Snapping

The zone editor supports two snapping modes namely “Snap to grid” and “Snap to zone”.
“Snap to grid” (left icon above) forces the boundaries of the shape to fall on the grid lines that are visible over the sample document.
“Snap to zone” (right icon above) locks on to or sticks to the boundary of an existing zone that is in close proximity of the zone being placed.
Undo, Redo and Delete
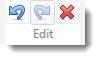
Some actions of the zone editor can be undone and actions that have been undone can be redone. Whenever an action is performed that can be undone the “Undo” button (left facing arrow button on the left shown above) is enabled. If an action has been undone the “Redo” button (right facing arrow button in the middle) is enabled. Actions that can be undone and/or redone are the deletion of a zone and all the alignment actions. The make-same-size actions in the “Size” group on the toolbar cannot be undone but manual sizing actions performed on individual zones can.
Alignment
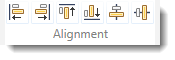
When multiple zones are selected they can be aligned in one of six ways:
-
Left border
-
Right border
-
Top border
-
Bottom border
-
Vertical centers
-
Horizontal centers
When multiple zones are selected alignment is done relative to the first zone that was selected which will be shown in red while the remaining selected zones are green.
Sizing Zones

When multiple zones are selected their width and height can be made the same as the zone that was selected first - which will be shown in red while the remaining selected zones are green.
Zooming
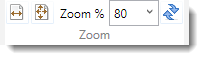
The zone editor working area can be zoomed in one of four ways:
-
Fit the width of the page to the visible editor area.
-
Fit the longest edge (typically height) to the visible editor area. This is equivalent to fitting the whole page.
-
Select a custom zoom factor from the drop down list or by typing in a zoom factor.
-
While pressing the control key on the keyboard zoom in by scrolling the mouse wheel upwards and zoom out by scrolling down.
To reset the zoom factor press the “Reset zoom” button to the right of the drop down list box.
Zone Properties
Zones have properties that can be configured in the property editor shown below:
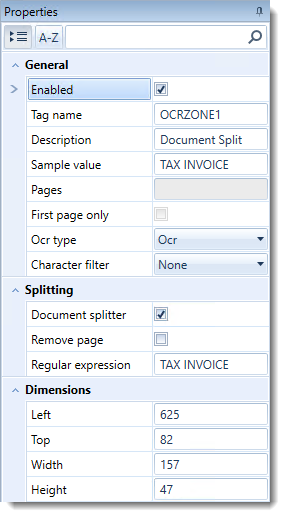
Enabled
Enables/disables the zone. If a zone is disabled it will not be OCRed by the ScannerVision Processing Server and is drawn in a light gray color in the zone editor.
Tag name
The name of the metadata tag to which the OCRed data must be assigned.
Description
A description of the data that the zone represents. This description is shown as a tool tip in the ScannerVision Expression Editor when the mouse is hovered over the metadata tag name.
Sample value
A value that is typical of the data contained in the zone. This value is assigned as the metadata tag value in the ScannerVision Expression Editor.
Pages
Specifies the pages on which the zone must be OCRed. Distinct pages as well as page ranges are supported e.g. “1, 2, 5-10”. You can also add round brackets to ranges if it makes it easier for you to read e.g. “1, 2, (5-10)”.
Note
If any form of document splitting is enabled the pages you specify here are relative to the split document and not the original document unless no split occurred.
First page only
When this option is selected the zone is OCRed on the first page of the document only, regardless of what the Pages property specifies.
Ocr type
The type of OCRing that would be performed by the zone. You can change the OCR type regardless of what its original type was. If you select the Zone OCR (“Z” button) and place a zone, you can change it to ICR by selecting Icr from the list without needing to delete the Zone OCR zone and re-adding an ICR zone.
Character filter
Specifies the type of character filter to apply. A character filter allows only the selected type of character to be recognized. For example, if you set the filter to “Digit” only numeric characters will be recognized.
Character filter options are:
| Alpha | Upper and lowercase letters only. This is a combination of "Uppercase" and "Lowercase". |
| Digit | Recognition of numerals only. For example: "3" (Digit Three). |
| Lowercase | Recognition of lowercase letters only including accented ones. For example: "a" (Lowercase a). |
| Miscellaneous | Recognition of miscellaneous characters only. For example: "+" (Plus sign). |
| None | All characters are recognized. |
| Punctuation | Recognition of punctuation signs only. For example: "!" (Exclamation Mark). |
| Uppercase | Recognition of uppercase letters only, including accented ones. For example: "A" (Capital A). |
Document splitter
When this option is enabled, the OCR Zone will be used as a document splitter on any value that falls within the zone.
Remove page
When this option is enabled, the page on which a value is found will be removed from the final output document.
Regular expression
A regular expression or string can be specified to ensure that the document will only be split when a match is found.
For example, multiple pages are scanned and need to be split whenever the word INVOICE appears in the specified OCR Zone.
Height
The height of the zone in pixels.
Left
The left position of the zone in pixels.
Top
The top position of the zone in pixels.
Width
The width of the zone in pixels.
Barcode Zones
Please refer to the Zonal Barcodes section for barcode specific properties.